Uniflower Baby Blanket


EDIT: The instructions for this pattern have been reviewed and updated on July 25th, 2020.

Hello friends! I've been fond of these 3D little crochet flowers featured on MyPicot.com ever since I discovered the site, but never had the guts to learn how to crochet and incorporate them in any design. Having a combination of baby yarn at hand, I decided that this is the time to put my own spin on this, and so I came up with this baby blanket project.
I had a blast crocheting this blanket, as I found that work flowed easily and smoothly once I got the hang of crocheting the flowers. You can also choose to make it in one color, pink or blue to make the blanket suit a baby's gender, or make it using any unisex color you fancy. Have fun making it! 

Level: Intermediate 


Materials
  • Yarn: Alize, Sekerim, Mini Colors, (100% Acrylic), 100 g/ 3.52 oz, 320 m/ 350 yards, color 6263: 2 skeins (A)Alize, Baby Best, (90% Acrylic, 10% Bamboo), 100 g/ 3.52 oz, 240 m/ 262 yds, color Blue 185: 2 skeins (B), color Pink 189: 2 skeins (C).
  • Crochet Hook: 4 mm/ US G-6.
  • Tapestry needle


Measurements: 77.5 x 77.5 cm/ 30.5" x 30.5" approx.

Gauge: 
  • Yarn (A): 20 sts and 13 rows = 4"x 4" (10 cm x 10 cm) in double crochet stitch. 
  • Yarn (B) and (C): 20 sts and 10 rows = 4"x 4" (10 cm x 10 cm) in double crochet stitch.
Yardage: 1250- 1300 m/ 1500-1550 yds.


Crochet Terms (US):
  • ch: chain.
  • ss: slip stitch.
  • sc: single stitch.
  • dc: double crochet.
  • cps: crochet puff stitch.
  • dc2tog: double crochet 2 together.


Notes
  • Ch 3 at the beginning of rows counts as tr.
  • Don't cut yarn (A) when working with yarn (B) or (C), you can hide it later when crocheting the edge rounds.
  • Yarn (B) and (C) are used alternately.
  • The pattern of crochet puff stitch and flower tutorials are at the bottom of the post.


Instructions:

With yarn (A), make a knot and work as follows:

Row 1: Ch 4, dc 3, tr in first ch, turn. (5 sts)

Row 2: (ch 3, dc 2) in first st, dc in dc to last st, (dc, tr) in last st, turn. (8 sts)

Row 3 and 4: repeat row 2. (14 sts)

Flower stripe rows:

Join yarn (B) and work next two rows:

Row 5: (ch 3, dc 2) in first st, dc in dc 5 times, skip st, ch 1, dc in dc 6 times, (dc, tr) in last st, turn.

Row 6: (ch 3, dc 2) in first st, dc in dc 5 times, skip 2 sts, ch 2, dc 2 in ch 1 space, make the flower pattern, skip 2 sts, ch 2, dc in dc 5 times, (dc, tr) in last st, cut yarn, turn.

With yarn (A) work next four rows:


Row 7: (ch 3, dc 2) in first st, dc in dc 6 times, dc 3 in ch 2 space, skip flower sts, dc 2 in next ch 2 space, dc in dc 7 times, (dc, tr) in last st, turn. (23 sts)

Rows 8 to 10: repeat row 2. (32 sts)


Join yarn (C) and work next two rows:

Row 11: (ch 3, dc 2) in first st, dc in dc 5 times, skip st, ch 1, dc in dc 17 times, skip st, ch 1, dc in dc 6 times, (dc, tr) in last st, turn.

Row 12: (ch 3, dc 2) in first st, dc in dc 5 times, skip 2 sts, ch 2, dc 2 in ch 1 space, make the flower pattern, skip 2 sts, ch 2, dc in dc 13 times, skip 2 sts, ch 2, dc 2 in ch 1 space, make the flower pattern, skip 2 sts, ch 2, dc in dc 5 times, (dc, tr) in last st, cut yarn, turn.

With yarn (A) work next four rows:

Row 13: (ch 3, dc 2) in first st, dc in dc 6 times, dc 3 in ch 2 space, skip flower sts, dc 2 in next ch 2 space, dc in dc 13 times, dc 3 in ch 2 space, skip flower sts, dc 2 in next ch 2 space, dc in dc 7 times, (dc, tr)  in last st, turn. (41 sts)

Rows 14 to 16 : repeat row 2. (50 sts)


General pattern (increase rows):

Join yarn (B) and work next two rows:

Row 1: (ch 3, dc 2) in first st, dc in dc 5 times, skip st, ch 1, *dc in dc 17 times, skip st, ch 1, repeat from * to last 7 sts, dc in dc 6 times, (dc, tr) in last st, turn.

Row 2: (ch 3, dc 2) in first st, dc in dc 5 times, skip 2 sts, ch 2, dc 2 in ch 1 space, make the flower pattern, skip 2 sts, ch 2, *dc in dc 13 times, skip 2 sts, ch 2, dc 2 in ch 1 space, make the flower pattern, skip 2 sts, ch 2, repeat from * to last 6 sts, dc in dc 5 times, (dc, tr) in last st, cut yarn, turn.


With yarn (A) work next four rows:

Row 3: (ch 3, dc 2) in first st, dc in dc 6 times, dc 3 in ch 2 space, skip flower sts, dc 2 in next ch 2 space, *dc in dc 13 times, dc 3 in ch 2 space, skip flower sts, dc 2 in next ch 2 space, repeat from * to last 8 st, dc in dc 7 times, (dc, tr)  in last st, turn. 

Rows 4 to 6 : (ch 3, dc 2) in first st, dc in dc to last st, (dc, tr)  in last st, turn. 

Repeat these 6 rows pattern 8 times, or as many as you prefer. Note: don't forget to change the flower rows yarn (B) and (C) alternately .

Join yarn (B) and work next two rows (blanket diagonal):

Row 1: (ch 3, dc 2) in first st, dc in dc 5 times, skip st, ch 1, *dc in dc 17 times, skip st, ch 1, repeat from * to last 7 sts, , dc in dc 6 times, (dc, tr) in last st, turn.

Row 2: (ch 3, 2 dc) together, dc in dc 3 times, skip 2 sts, ch 2, dc 2 in ch 1 space, make the flower pattern, skip 2 sts, ch 2, *dc in dc 13 times, skip 2 sts, ch 2, dc 2 in ch 1 space, make the flower pattern, skip 2 sts, ch 2, repeat from * to last  6 sts, dc in dc 4 times, dc2tog, cut yarn, turn.


General pattern (decrease rows):

With yarn (A) work next four rows:

Row 1: (ch 3, dc 2) together, dc in dc twice, dc 3 in ch 2 space, skip flower sts, dc 2 in next ch 2 space, *dc in dc 13 times, dc 3 in ch 2 space, skip flower sts, dc 2 in next ch 2 space, repeat from * to last 4 sts, dc in dc twice, dc2tog, turn.

Rows 2 to 4: (ch 3, dc 2) together, dc in dc to last 2 sts, dc2tog, turn.

Join yarn (C) and work next two rows:

Row 5: (ch 3, dc 2) together, dc in dc 7 times, skip st, ch 1, *dc in dc 17 times, skip st, ch 1, repeat from * to last 9 sts, dc in dc to 7 times, dc2tog, turn.

Row 6: (ch 3, dc 2) together, dc in dc 3 times, skip 2 sts, ch 2, dc 2 in ch 1 space, make the flower pattern, skip 2 sts, ch 2, *dc in dc 13 times, skip 2 sts, ch 2, dc 2 in ch 1 space, make the flower pattern, skip 2 sts, ch 2, repeat from * to last  6 sts, dc in dc 4 times, dc2tog, cut yarn, turn.

Repeat this (6 rows pattern) 9 times, or until 14 sts are left.


Last decrease rows:

With yarn (A) work last four rows:

Row 1: (ch 3, dc 2) together, dc in dc twice, dc 3 in ch 2 space, skip flower sts, dc 2 in next ch 2 space, dc in dc twice, dc2tog, turn. (11 sts)

Rows 2 and 3: (ch 3, dc 2) together, dc in dc to last 2 sts, dc2tog, turn. (5 sts)

Row 4: (ch 3, dc 4) together, cut yarn.

Weave in loose ends.


Edging:

join yarn (C) at any corner, into the ch 3 post:

Round 1: ch 1, *sc 3 into ch 3 space, sc 3 in tr post, repeat to next corner, ch 1, repeat from * around the blanket, ss to first sc.

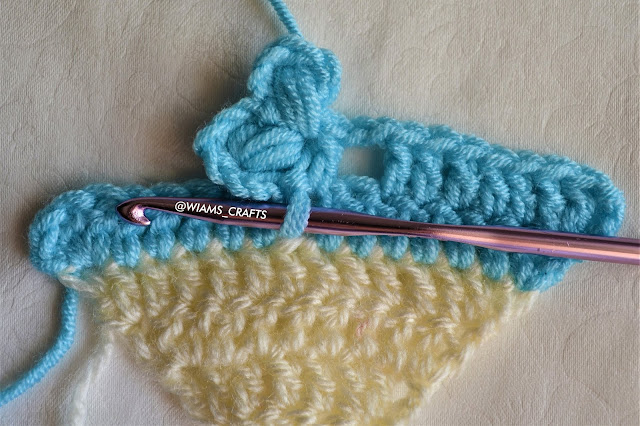
Round 2: ch 1, reverse sc into sc, skip sc, repeat around the blanket. (Note: skip the ch 1 at corners instead of sc). ss to first reverse sc, cut yarn. Weave in loose ends and block if needed. (See photo below)


Crochet Puff Stitch (cps):

  1. Yarn over, insert hook around the dc post (or where it is placed in the pattern), yarn over again and draw through. (3 loops on the hook)
  2. Repeat step 1 two more times.(7 loops on the hook)
  3. Yarn over and pull through 6 loops.
  4. Yarn over and pull through the remaining 3 loops on the hook.

Flower pattern:

Flower pattern is worked in yarn (B) and (C) stripes only. The place of the flower is mentioned in the general pattern (check please):


1. ch 3, make 1 cps around the the second dc post, ch 3, ss around the same dc.


2. Repeat step 1.


3. ch 3, (make 1 cps, ch 3 and ss) through ch 1 of previous row and dc of the row below.


 4. ch 3, make 1 cps around the first dc post, ch 3, ss around the same dc.


5. Repeat step 4.


6. Bring the ch on hook to back through the flower center.


7. Follow the rest of instructions.


Lastly, feel free to leave a comment if you have any questions or find something confusing in the pattern.


Happy crocheting/knitting! follow me on Instagram @wiams_crafts and Twitter @wiamscrafts to see my upcoming projects.

Candy Corn Sweater


I've wanted to work on a Halloween-themed project for the last three years, but every time I find my self swarmed with work, and I miss the opportunity to work on something. So this year, I've decided to start two months ahead, because I'm slow when it comes to creating a design I am satisfied with. 
This fluffy sweater features a cute candy corn pattern, is sure to keep a kid warm while trick-or-treating, and comes in 4 sizes. I hope you have enough time to finish knitting it for your beloved little ones. 

Level: intermediate

Candy Corn Drawstring Backpack


Hello everyone! So today, I bring a Halloween-inspired drawstring backpack that the kids can take trick-or-treating. It's fun, simple to make, and it's big enough to collect candy to feed a small army of kids (just kidding). On the other hand, if you are not into that, it can be used as a cute accessory during Halloween season. I hope you have fun making and using it!

Level: Easy

Materials:
  • Yarn: Nako Vizon: (100% premium acrylic, 100 g/ 3.53 Oz, 195 m/ 213 yds): Light yellow, color no. 215: 1 skein. Yellow, Color no. 184: 1 skein. White, color no. 208: 1 skein.
  • Hook US J-10 / 6 mm
  • Tapestry needle.
  • The Cord: You can either buy a 4.5 feet long suitable cord, or make one using a simple way you find it here.

Measurements:

  • Base: 7" / 18 cm long, 2.5" / 7 cm wide.
  • Body: 11" / 28 cm wide, 11" / 28 cm height.
  • Cord: 54" / 138 cm approx.

Gauge: 
18 sts x 20 rows in sc pattern.

Yardage: 220 - 230 m/ 240- 250 yds


Instructions:

With light yellow yarn, make 19 ch.

The Base:

Round 1: sc 4 in the second ch from hook, sc in ch 16 times, sc 4 in last ch, turn to other side of chains, sc in ch 16 times, sl st into first sc, ch 1.

Round 2: *sc 2 in st 4 times, sc in st 16 times, repeat from * one more time, sl st into first sc, ch 1.

Round 3: *sc 2 in st twice, sc in st 4 times, sc 2 in st twice, sc in st 16 times, repeat from * one more time, sl st into first sc, ch 1.

Round 4: sc in st twice, sc 2 in st twice, sc in st 4 times, sc 2 in st twice, sc in st 20 times, sc 2 in st twice, sc in st 4 times, sc 2 in st twice, sc in st 18 times, sl st into first sc, ch 1.

Round 5: sc in sc three times, sc 2 in st twice, sc in st 6 times, sc 2 in sc twice, sc in sc 22 times, sc 2 in st twice, sc in st 6 times, sc 2 in sc twice, sc in st 19 times, sl st into first sc, ch 1.

Round 6: sc in sc 4 times, sc 2 in st , sc in st 10 times, sc 2 in st, sc in st 24 times, sc 2 in sc, sc in st 10 times, sc 2 in sc, sc in st 20 times, sl st into first sc, ch 1.

Round 7: sc in st 5 times, sc 2 in st, sc in st 10 times, sc 2 in st, sc in st 26 times, sc 2 in st, sc in st 10 times, sc 2 in st, sc in st 21 times, sl st into first sc, ch 1. (80 sts)


The Body:
Note: sc next round through back loops only.

Round 8: *sc in st 3 times, sc 2 in st, repeat from * 16 times, sc in st to end, sl st into first sc, ch 1. (96 sts)

Repetitive Round: sc in st to end, sl st into first sc, ch 1.

With light yellow yarn, work 17 rounds.

With yellow yarn, work 18 rounds.

With white yarn, work 16 rounds.

Make the cord holes round: *sc in st 4 times, skip 2 sts, ch 2, repeat from * to end, sl st into first sc, ch 1.

Next round: *sc in st 4 times, sc 2 in ch 2 space, repeat from * to end, sl st into first sc, ch 1.

Work the repetitive round one more time. then work the inverse sc pattern: *inverse sc, skip st, ch 1, repeat from * to end, cut yarn.


The Straps (make 2):
With white yarn ch 8, leaving 8" / 20 cm yarn for sewing, sc into the second ch from hook and the rest of chains (7 sts), ch 1, turn.

Repetitive Row: sc in st 7 times, ch 1, turn.

Repeat the row 60 times (15" / 38 cm), cut yarn leaving 8" / 20 cm for sewing.

Sewing the straps on the back:

Sew the straps in the first round of the body, leave 6 sts between them. 
Sew the other ends of the straps under hole making round, on both sides of back center. 


Weave in loose ends, weave the cord in and out the ch 2 spaces, make sure that the ends of cord come out through the front two center openings.


Lastly, feel free to leave a comment if you have any questions or find something confusing in the pattern.

Happy crocheting/knitting! follow me on Instagram @wiams_crafts and Twitter @wiamscrafts to see my upcoming projects.

Ribbed Shawlette


Hello everyone! This is the third and last shawl I've knitted using Lionbrand Mandala yarn. It is easy and quick to make, looks nice, and could be worn in many ways. Small shawls are a must in every woman's wardrobe, especially those who have outdoor activities. I hope you enjoy making and wearing it. 

Overview:
  • Skill level: Intermediate.
  • Instructions style: Written pattern.
  • Available sizes: one size (see detailed measurements below).
  • Yarn weight: 3/ light/ DK.


Get the ad-free, printable PDF of this pattern from my store:

Or click here to jump to the instructions.


Want to pin this project for later? Just hover or click on any of the images in this post then click the red "save" button.


Materials:

  • Yarn: Lion brand Mandala, 100% acrylic, 5.3 oz (150 g), 590 yards (450 m), in the color “Pegasus” 210: 1 skein.
  • Circular knitting needles, 40" (100 cm) long, size US 8 (5 mm).
  • Tapestry needle.
  • Stitch marker.


Measurements: width = 48 inch (122 cm), height = 17 inch (43 cm), approx.

Gauge: 20 sts and 28 rows = 4"x 4" (10 cm x 10 cm) in (3 sts ribbed) pattern.

Yardage: 585 - 590 yards (535 - 540 m) approx.


Knitting Terms:
  • st: stitch.
  • sts: stitches.
  • k: knit.
  • p: purl.
  • k2tog: knit 2 sts together.
  • ssk: slip, slip, knit the 2 sts together through back loops.
  • sl st: slip stitch.
  • wyib: with yarn in back.
  • wyif: with yarn in front.
  • RS: right side.
  • WS: wrong side.


Instructions:

Note: Working with multi-colored yarn, the skein might not start with the color you want to begin with. In that case, I cut the yarn and reattach it to get the desired color sequence.

Cast on 307 sts, work as follows:

Row 1 (RS): k 5, *p 3, k 3, repeat from * to last 2 sts, k 2.

Row 2 (WS): sl st 1 wyib, p 1, *p 3, k 3, repeat from * to last 5 sts, p 3, sl st 1 wyif, p 1.

Row 3: sl st 1 wyib, k 1, *k 3, p 3, repeat from * to last 5 sts, k 3, sl st 1 wyib, p 1.

Row 4: repeat row 2.


Rib Pattern:

Note: count 153 sts, put a st marker before next st, and another st marker after it, this is the center st.

Row 1: sl st 1 wyib, *k 3, p 3, repeat from * to 2 sts before center st, k2tog, k the center st, ssk, *p 3, k 3, repeat from * to last 7 sts, p 3, k 2, sl st 1 wyib, p 1.

Row 2: sl st 1 wyib, p 3, *k 3, p 3, repeat from * to last 7 sts, k 3, p 2, sl st 1 wyif, p 1.

Row 3: sl st 1 wyib, k 2, p 3, *k 3, p 3, repeat from * to 2 sts before center st, k2tog, k the center st, ssk, *p 3, k 3, repeat from * to last 6 sts, p 3, k 1, sl st 1 wyib, p 1.

Row 4: sl st 1 wyib, p 2, *k 3, p 3, repeat from * to last 6 sts, k 3, p 1, sl st 1 wyif, p 1.

Row 5: sl st 1 wyib, k 1, p 3, *k 3, p 3, repeat from * to 2 sts before center st, k2tog, k the center st, ssk, * p 3, k 3, repeat from * to last 5 sts, p 3, sl st 1 wyib, p 1.

Row 6: sl st 1 wyib, p 1, *k 3, p 3, repeat from * to last 5 sts, k 3, sl st 1 wyif, p 1.

Row 7: sl st 1 wyib, k 1, p 2, *k 3, p 3, repeat from * to 2 sts before center st, k2tog, k the center st, ssk, *p 3, k 3, repeat from * to last 4 sts, p 2, sl st 1 wyib, p 1.

Row 8: sl st 1 wyib, p 1, k 2, p 3, *k 3, p 3, repeat from * to last 4 sts, k 2, sl st 1 wyif, p 1.

Row 9: sl st 1 wyib, k 1, p 1, *k 3, p 3, repeat from * to 2 sts before center st, k2tog, k the center st, ssk, * p 3, k 3, repeat from * to last 3 sts, p 1, sl st 1 wyib, p 1.

Row 10: sl st 1 wyib, p 1, k 1, p 3, *k 3, p 3, repeat from * to last 3 sts, k 1, sl st 1 wyif, p 1.

Row 11: sl st 1 wyib, k 1, *k 3, p3, repeat from * to 2 sts before center st, k2tog, k the center st, ssk, * p 3, k 3, repeat from * to last 2 sts, sl st 1 wyib, p 1.

Row 12: sl st 1 wyib, p 4, *k 3, p 3, repeat from * to last 2 sts, sl st 1 wyif, p 1.

Repeat rows 1-12 seven times, repeat rows 1-6 once, then work as follows:

Row 1: sl st 1 wyib, k 1, p 3, *k 3, p 3, repeat from * to last 2 sts, sl st 1 wyib, p 1.

Row 2: sl st 1 wyib, p 1, *k 3, p 3, repeat from * to last 5 sts, k 3, sl st 1 wyif, p 1.

Row 3: repeat row 1.

Row 4: repeat row 2.

Row 5: repeat row 1.

Bind off all sts.


Lastly, feel free to leave a comment if you have any questions or find something confusing in the pattern.

Happy crocheting/knitting! follow me on Instagram @wiams_crafts and Twitter @wiamscrafts to see my upcoming projects.

Summer Granny Square part 2 - Baby Blanket Edition


As promised, here is part two of my Summer Granny Square project, where I show you how to make a baby blanket using the granny square posted in a previous post. this is the perfect gift for a baby born in the coming fall and winter. I hope you have fun making it, Happy crocheting!


Level: intermediate 


Ruffled Shawlette

Small shawls are nice and easy to wear, whether during day or at night. as the star of your look, or as an accessory and warm piece that doesn't dominate your overall appearance, that is why I like them. hence, I present to you this piece; simple, elegant with gorgeous ruffled edging.

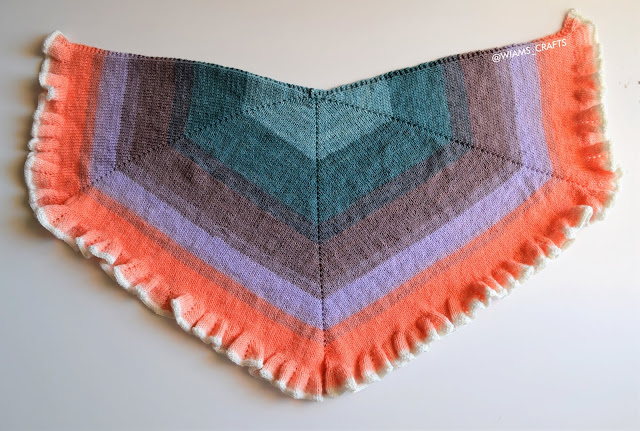
This is my second knitting trial using Lionbrand Mandala, and it really went well. This yarn is soft and easy to knit. Working with this multi-colored yarn, I found that deciding the best sequence of colors is vital to the final look; as you can see, this shawl begins with the darkest color, and ends with the lightest one (white), to give the ruffled edge a soft and light finish.

Have fun knitting and wearing this piece in the upcoming fall.

Skill level: intermediate 


Materials:
  • Lion brand Mandala, 100% acrylic, 5.3 oz (150 g), 590 yards (450 m), in the color “Pegasus” 210: 1 skein.
  • Circular knitting needles, size US 7 (4.5 mm), 40" (100 cm) long.
  • Tapestry needle.
  • Stitch marker.


Measurements: width = 50" (127 cm), height = 29" (74 cm), approx. 

Gauge: 16 sts and 27 rows = 4"x 4" (10 cm x 10 cm) in stockinette stitch.

Yardage: 585 - 590 yards (535 - 540 m), approx.


Knitting Terms: 
  • st: stitch
  • sts: stitches
  • k: knit
  • p: purl
  • kyokrb (porthole eyelet): (k 1, yarn over, k 1) into the same stitch in the row below. For more on how to Knit this, you can watch this tutorial video I made: 


Instructions

Note 1: Working with multi-colored yarn, the skein might not start with the color you want to begin working with. in this case, I cut the yarn and reattach it, so that I get the desired color sequence. 

Note 2: always mark the center st of the porthole eyelets.

Cast on 3 sts, knit 7 rows, turn work 90 degrees clockwise, pick up 1 st out of each purl row side (3 sts in total), turn work 90 degrees clockwise again, pick up 3 sts from bottom. (9 sts)

You can also watch this video tutorial to learn how to do this type of cast on:


Row 1 (wrong side): k 3, p 3, k 3. (9 sts)

Row 2: k 3, kyokrb 3 times, k 3. (15 sts)

Row 3: k 3, p to last 3 sts, k 3.

Row 4: *k to porthole eyelet st, kyokrb, repeat from * to last 3 sts, k 3. (21 sts)

Row 5: repeat row 3.

Repeat rows (4 and 5) fifty more times, (318 sts), then work as follows:

Row 1: (k 3, kyokrb) repeat 13 times, *k 4, kyokrb, (k 3, kyokrb) repeat 24 times, k 4, kyokrb, repeat from * once more, (k 3, kyokrb) repeat 13 times, k 3.

Row 2: k 3, p to last 3 sts, k 3.

Row 3: *k to porthole eyelet st, kyokrb, repeat from * to last 3 sts, k 3.

Row 4: k 3, p to last 3 sts, k 3.

Row 5: repeat row 3.

Row 6: repeat row 4.

Row 7: repeat row 3.

Row 8: repeat row 4.

Row 9 and 10: k all sts.

Cast off all sts. Weave in loose ends. Block if needed.


 Lastly, feel free to leave a comment if you have any questions or find something confusing in the pattern.

Happy crocheting/knitting! follow me on Instagram @wiams_crafts and Twitter @wiamscrafts to see my upcoming projects.

Summer Granny Square


This month, I took a little break from my main knitting projects, and tried small crochet Ideas, such as this granny square. Having some left over sport cotton and acrylic sport yarn, that I am not willing to throw away, I pushed my hands to hold a hook and start a granny square this time around.

Though I don't fancy making baby blankets out of granny squares that much, because they require loads of work to assemble, on top of having to make their many parts. But, a summer should not pass by without making one, no matter what the method used in the making. 

So in this post I present my humble granny square to you. Tune in for my upcoming post, where I will show you how to make a baby blanket that has this granny square as its base.

Level: intermediate