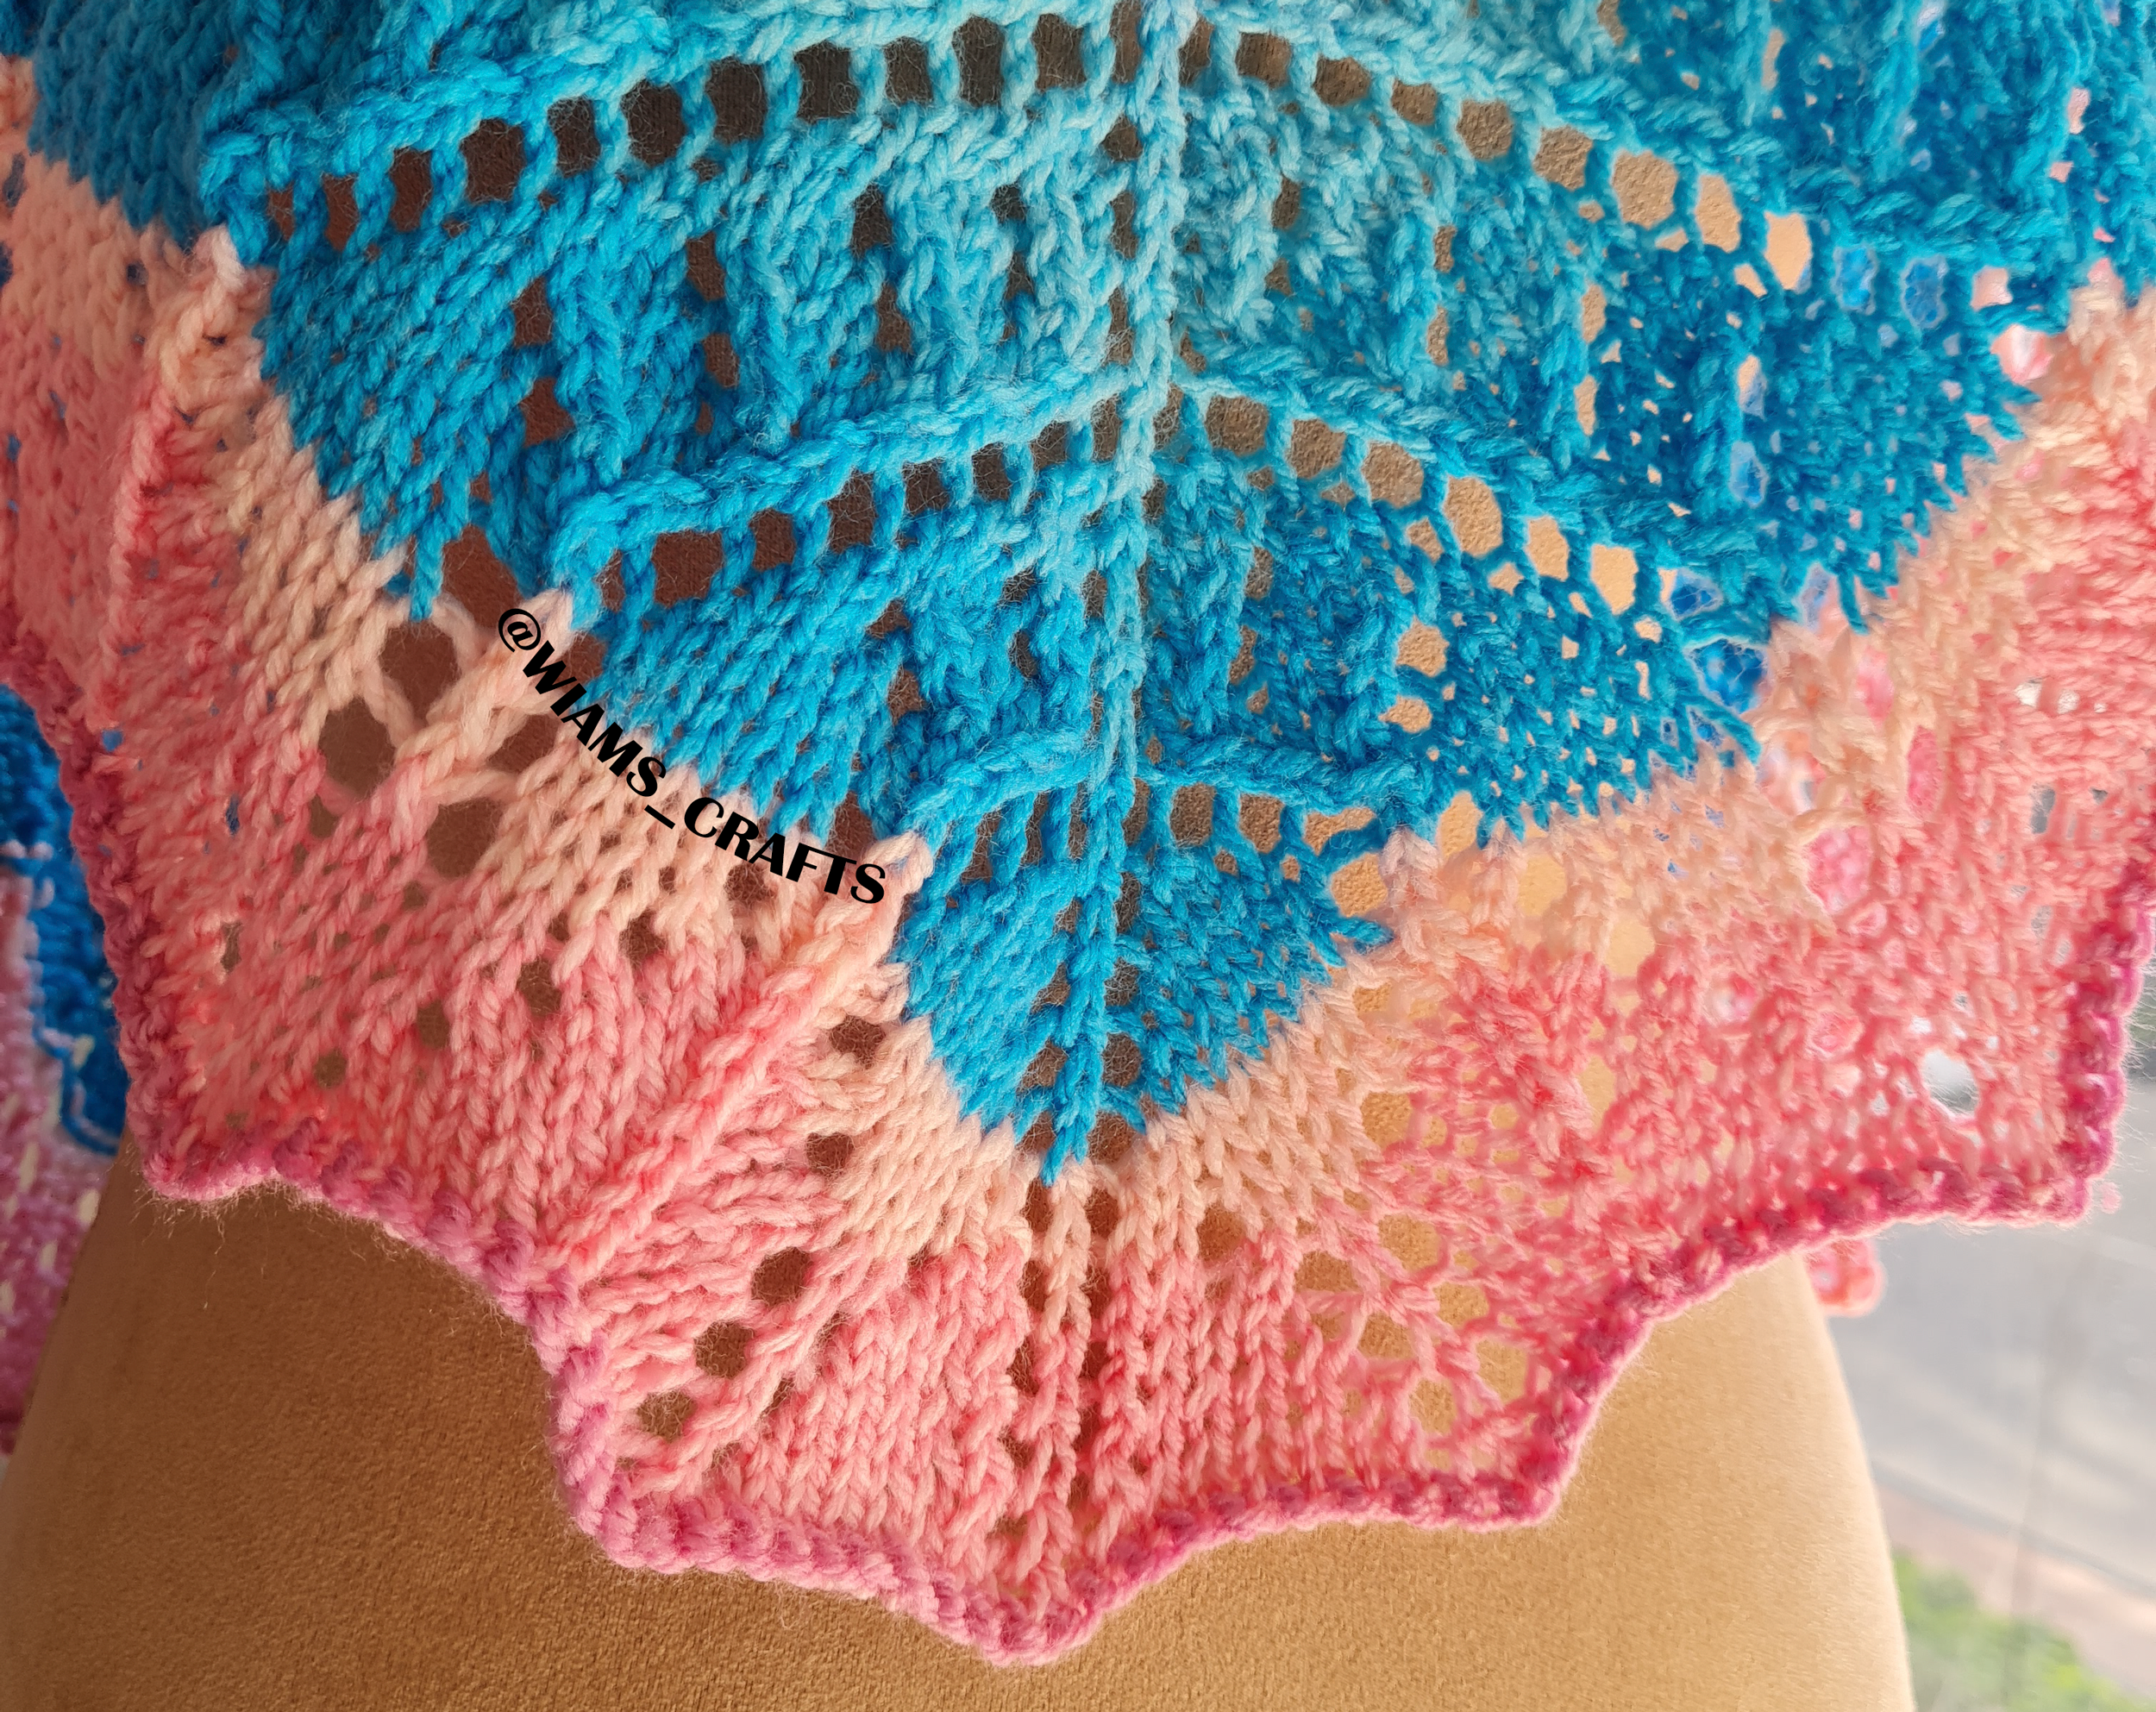
There's something truly magical about watching a shawl come to life stitch by stitch, especially when it's as rich in texture and color as this one. Inspired by the gentle transition of seasons, this hand-knitted shawl features a soothing gradient of earthy browns blending into soft cream and vibrant purples. The intricate lacework and color transitions give it a timeless elegance, perfect for adding a cozy, artistic touch to any outfit. Whether draped over the shoulders for a cool evening or styled as a statement piece, this shawl is both a labor of love and a celebration of craftsmanship.

Overview:
- Skill level: Intermediate.
- Instructions style: written pattern + chart.
- Yarn weight: #2/fine/lace.
- Available sizes: one size (see detailed measurements below).
- Size customization: you can adjust the size to be larger or smaller by repeating the general pattern more or less times than mentioned in the instructions.
Get the ad-free, printable PDF of this pattern from my store:
Or click here to jump to the instructions.
Want to pin this project for later? Just hover or click on any of the images in this post then click the red "save" button.

Materials:
- Suggested yarn: Nako, Angora Luks color, 5% mohair, 15% wool, 80% acrylic, 5.3 oz (150 g), 885 yards (810 m), in the color "81921", 1 cake.
- Circular knitting needles, 32" (80 cm) long, size US 8 (5 mm).
- Tapestry needle.
- Ring stitch markers.
Measurements: width = 35" (89 cm), length = 70" (178 cm), approx.
Yardage: 880- 885 yards (805- 810 m), approx.
Gauge: 20 sts and 26 rows = 4" x 4" (10 cm x 10 cm) in stockinette stitch and size US 8 (5 mm) knitting needles.

Knitting Terms:
- st: stitch.
- sts: stitches.
- k: knit.
- p: purl.
- yo: yarn over.
- k2tog: knit two stitches together.
- ssk: slip, slip, knit the two slipped stitches together through back loops.
- k2p1tog: slip st, k2tog and pass the sl st over them (double decrease).
- s2s1ktog: slip two stitches as if to knit them together, slip the third one knit-wise, knit the three stitches together through back loops (centered double decrease). You can watch my tutorial video below to learn how to knit this stitch:

Instructions:
Cast on 3 sts, knit 7 rows, turn work 90 degrees clockwise, pick up 1 st out of each purl row side (3 sts in total), turn work 90 degrees clockwise again, pick up 3 sts from bottom. (9 sts)
You can also watch this video tutorial to learn how to do this type of cast on:
Row 1 (wrong side): k 3, p 3, k 3. Put a ring stitch marker before and after the middle stitch, this is the center stitch.
Row 2: k 3, (yo, k 1) three times, yo, k 3. (13 sts)
Row 3 and every odd number row: k 3, p to last 3 sts, k 3.
Row 4: k 3, yo, k 3, yo, k the center st, yo, k 3, yo, k 3.
Row 6: k 3, yo, k 5, yo, k the center st, yo, k 5, yo, k 3.
Row 8: k 3, yo, k 1, yo, ssk, k 1, k2tog, yo, k 1, yo, k the center st, yo, k 1, yo, ssk, k 1, k2tog, yo, k 1, yo, k 3
Row 10: (k 3, yo) twice, k2p1tog, yo, k 3, yo, k the center st, yo, k 3, yo, k2p1tog, (yo, k 3) twice.
Row 12: k 3, yo, k 1, yo, ssk, k 5, k2tog, yo, k 1, yo, k the center st, yo, k 1, yo, ssk, k 5, k2tog, yo, k 1, yo, k 3.
Row 14: k 3, yo, k 3, yo, ssk, k 3, k2tog, yo, k 3, yo, k the center st, yo, k 3, yo, ssk, k 3, k2tog, yo, k 3, yo, k 3.
Row 16: k 3, yo, k 5, yo, ssk, k 1, k2tog, yo, k 5, yo, k the center st, yo, k 5, yo, ssk, k 1, k2tog, yo, k 5, yo, k 3.
Row 18: k 3, yo, k 1, yo, ssk, k 1, k2tog, yo, k 5, yo, ssk, k 1, k2tog, yo, k 1, yo, k the center st, yo, k 1, yo, ssk, k 1, k2tog, yo, k 5, yo, ssk, k 1, k2tog, yo, k 1, yo, k 3.
Row 20: (k 3, yo) twice, k2p1tog, yo, k 7, yo, k2p1tog, yo, k 3, yo, k the center st, yo, k 3, yo, k2p1tog, yo, k 7, yo, k2p1tog, (yo, k 3) twice.
General pattern:
Row 22: k 3, yo, *k 1, yo, ssk, k 5, k2tog, yo*, repeat between ** to one st before center st, k 1, yo, k the center st, yo, repeat between ** to last four sts, k 1, yo, k 3.
Row 24: k 3, yo, *k 3, yo, ssk, k 3, k2tog, yo* repeat between ** to three sts before center st, k 3, yo, k the center st, yo, repeat between ** to last six sts, k 3, yo, k 3.
Row 26: k 3, yo, *k 5, yo, ssk, k 1, k2tog, yo* repeat between ** to five sts before center st, k 5, yo, k the center st, yo, repeat between ** to last eight sts k 5, yo, k 3.
Row 28: k 3, yo, k 1, *yo, ssk, k 1, k2tog, yo, k 5*, repeat between ** to six sts before center st, yo, ssk, k 1, k2tog, yo, k 1, yo, k the center st, yo, k 1, repeat between *8 to last nine sts, yo, ssk, k 1, k2tog, yo, k 1, yo, k 3.
Row 30: k 3, yo, k 3, *yo, k2p1tog, yo, k 7*, repeat between ** to six sts before center st, yo, k2p1tog, yo, k 3, yo, k the center st, yo, k 3, repeat between ** to last nine sts, yo, k2p1tog, (yo, k 3) twice.


Repeat the general pattern seventeen more times, then work the last rows pattern as follows:
Last rows pattern:
Row 32: k 3, yo, ssk, *k 3, yo, k 1, yo, k 3, s2s1ktog*, repeat between ** to 9 sts before center st, k 3, yo, k 1, yo, k 3, k2tog, yo, k the center st, yo, ssk, repeat between ** to last twelve sts, k 3, yo, k 1, yo, k 3, k2tog, yo, k 3.
Row 34: k 3, yo, k 1, ssk, *k 3, yo, k 1, yo, k 3, s2s1ktog*, repeat between ** to 9 sts before center st, k 3, yo, k 1, yo, k 3, k2tog, k 1, yo, k the center st, yo, k 1, ssk, repeat between ** to last twelve sts, k 3, yo, k 1, yo, k 3, k2tog, k 1, yo, k 3.
Row 36: k 3, yo, k 2, ssk, *k 3, yo, k 1, yo, k 3, s2s1ktog*, repeat between ** to 9 sts before center st, k 3, yo, k 1, yo, k 3, k2tog, k 2, yo, k the center st, yo, k 2, ssk, repeat between ** to last twelve sts, k 3, yo, k 1, yo, k 3, k2tog, k 2, yo, k 3.
Row 38: k 3, yo, k 3, ssk, *k 3, yo, k 1, yo, k 3, s2s1ktog*, repeat between ** to 9 sts before center st, k 3, yo, k 1, yo, k 3, k2tog, k 3, yo, k the center st, yo, k 3, ssk, repeat between ** to last twelve sts, k 3, yo, k 1, yo, k 3, k2tog, k 3, yo, k 3.
Finish row 38 then bind off all sts using stretchy method. Weave in loose ends. Block or steam well.

Lastly, feel free to leave a comment if you have any questions or find something confusing in the pattern.
Happy crocheting/knitting! follow me on Instagram @wiams_crafts and Twitter @wiamscrafts to see my upcoming projects.