
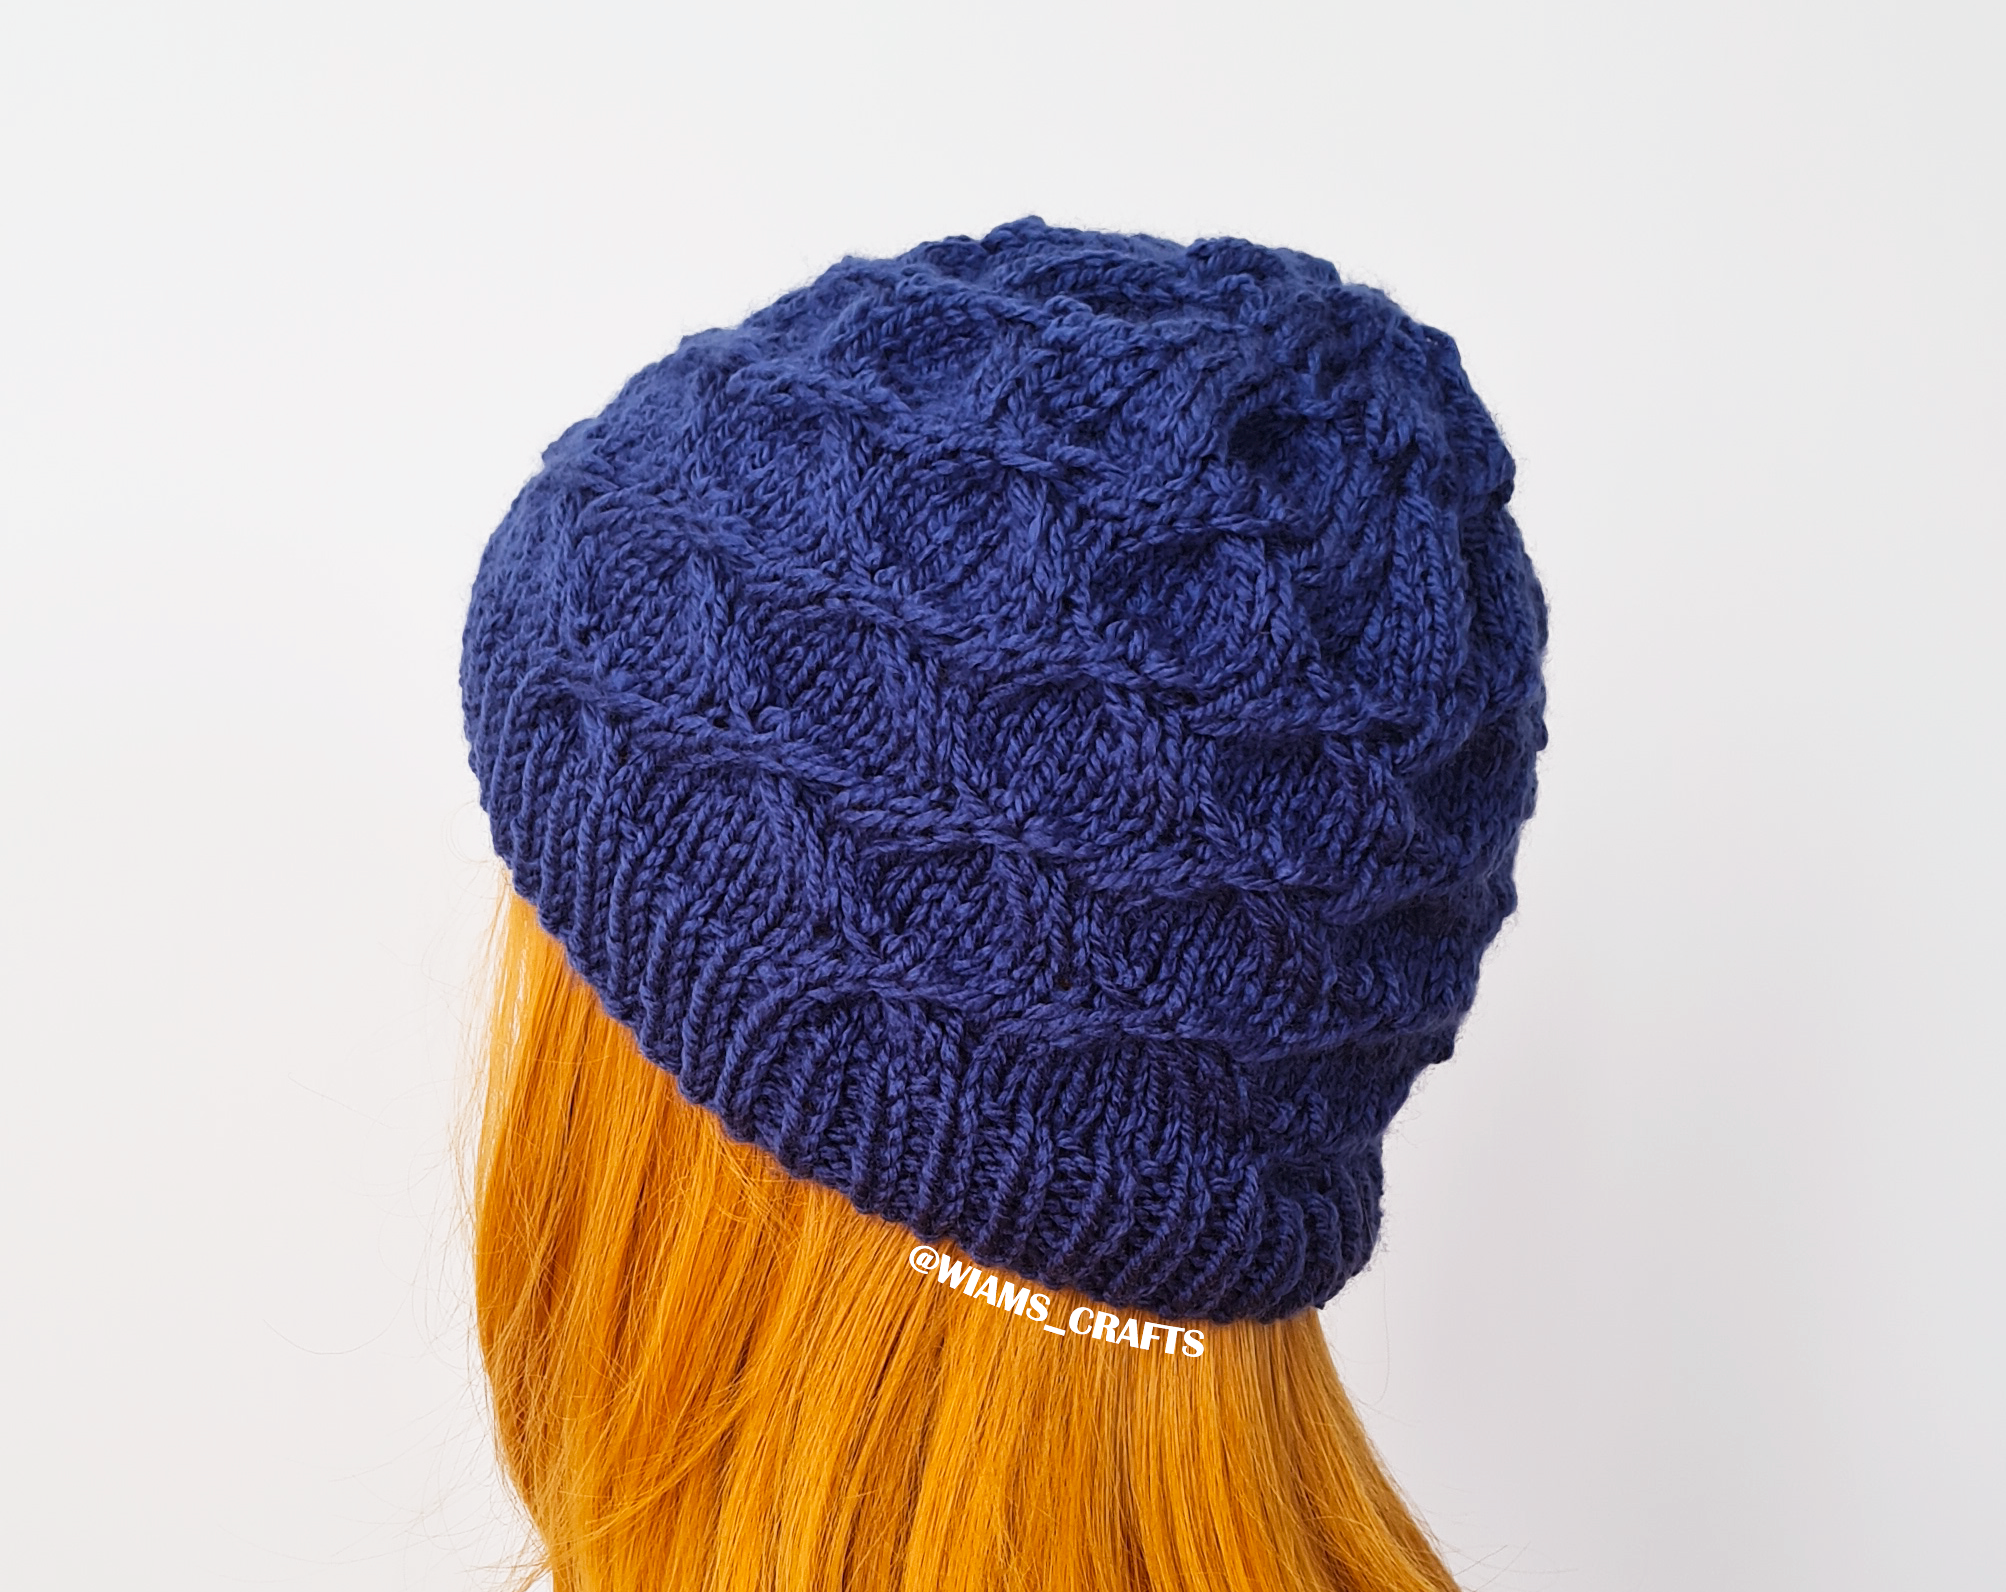
Hello Knitters! It's hard for me to believe that I have yet to knit a single hat this year, and we've reached the end of June! So when I noticed this, I rushed to finish a design that I had been working on for a while, then ended up making this hat in every color I had of this type of yarn, and in three different sizes. The main feature of this pattern is the simple twist that creates the bubble shapes. It is easy to knit if you read and follow the instructions carefully, or you can knit it according to the chart I provided if you prefer that. If you like This design, you can start right now and knit this awesome and cool hat for yourself, or your beloved ones as gifts for the upcoming holiday seasons. Looking forward to reading your comments and thoughts and have a nice knitting day!

Overview:
- Skill level: Intermediate.
- Instructions style: written pattern + video tutorials.
- Sizes: this hat is available in two sizes, S, M/L, (see detailed measurements below). Bonus size (L/XL): to knit this size, follow the same instructions for the M/L sized hat, but change the size of the knitting needle to US 10 (6 mm).
Get the ad-free, printable PDF of this pattern from my store:
Or click here to jump to the instructions.
Want to pin this project for later? Just hover or click on any of the images in this post then click the red "save" button.

Materials:
- Yarn: Alize Burcum Klasik, 100% acrylic, 3.5 oz (100 g), 230 yards (210 m), in the following colors and quantities:
- Size S (child size): 1 skein.
- Size M/L (adult size): 1 skein.
- Size L/XL (adult size): 1 skein.
- Circular knitting needles, 16" (40 cm) long, size US 7 (4.5 mm), US 9 (5.5 mm) and US 10 (6 mm) (for size L/XL only).
- Double pointed needles (DPNs) set, size US 9 (5.5 mm) and US 10 (6 mm) (for size L/XL only).
- Tapestry needle.
- Ring stitch marker.
- Size S (child size): head circumference = 18- 19" (45- 48 cm), height = 7.5" (19 cm).
- Size M/L (adult size): head circumference = 22- 23" (56- 58.5 cm), height = 8" (20.5 cm).
- Size L/XL (adult size): head circumference = 23- 24" (58.5 - 61 cm), height = 8.5" (21.5 cm).
Yardage:
- Size S (child size): 100- 105 yards (90- 95 m).
- Size M/L (adult size): 130- 132 yards (120- 122 m), approx.
- Size L/XL (adult size): 148- 150 yards (135- 137 m), approx.
Gauge: 17 sts and 22 rounds = 4" x 4" (10 cm x 10 cm) in stockinette stitch.
- st: stitch.
- sts: stitches.
- k: knit.
- p: purl.
- yo: yarn over.
- k2tog: knit two stitches together.
- ssk: slip, slip, then knit the two slipped stitches together through back loops.
- k3tog: knit three stitches together.
- sssk: slip, slip, slip, then knit the three slipped stitches together through back loops.
Instructions:
Note: to knit the size L/XL hat, follow the same instructions for the M/L sized hat, but change the size of the knitting needle to US 10 (6 mm) instead of US 9 (5.5 mm).
With size US 7 (4.5 mm) circular knitting needles, cast on 84 (98). Join in the round. Put a ring stitch marker at the beginning of rounds, purl one round, then work as follows:
Rib round: k 1, p 1, repeat to end.
Repeat the rib round 5 (6) more times. Switch to size US 9 (5.5 mm) circular knitting needles while working the first round of the general pattern:
General pattern:
Rounds 1 and 2: k to end.
Round 3: k 1, sssk, k3tog, k 7, repeat to end.
Round 4: k 1, switch next 2 sts putting the second st in front and keeping them on left needle, (k 1, yo, k 1) into each of these 2 sts, k 7, repeat to end.
Rounds 5 and 6: k to end.
Round 7: k 8, sssk, k3tog, repeat to end.
Round 8: k 8, switch next 2 sts putting the second st in front and keeping them on left needle, (k 1, yo, k 1) into each of these 2 sts, repeat to end.
Repeat the general pattern once (twice) more, then repeat rounds 1-7 once for Size S, and rounds 1-3 for Size M/L, then work as follows:
Decreasing Rounds for Size S:
Round 1: k 2, ssk, k2tog, k 2, switch next 2 sts putting the second st in front and keeping them on left needle, (k 1, yo, k 1) into each of these 2 sts, repeat to end. (72 sts)
Rounds 2 and 3: k to end.
Round 4: k 1, ssk, k2tog, k 7, repeat to end. (60 sts)
Rounds 5 and 6: k to end.
Round 7: ssk, k2tog, k 6, repeat to end. (48 sts)
Change to double pointed needles.
Round 8: k 2, sssk, k3tog, repeat to end.
Round 9: k 2, switch next 2 sts putting the second st in front and keeping them on left needle, (k 1, yo, k 1) into each of these 2 sts, repeat to end.
Rounds 10 and 11: k to end.
Round 12: k 3, ssk, k2tog, k 1, repeat to end. (36 sts)
Round 13: k 2, ssk, k2tog, repeat to end. (24 sts)
Round 14: sl st, *ssk, k2tog, repeat from * to last 3 sts, ssk, k the last st and the first slipped st of the same round together. (12 sts)
Cut yarn, leaving a 6" (15 cm) long yarn tail, pull it through all sts and tighten together. Weave in loose ends.
Decreasing Rounds for Size M/L:
Round 1: k 1, switch next 2 sts putting the second st in front and keeping them on left needle, (k 1, yo, k 1) into each of these 2 sts, k 2, ssk, k2tog, k 1, repeat to end. (84 sts)
Rounds 2 and 3: k to end.
Round 4: k 8, ssk, k2tog, repeat to end. (70 sts)
Rounds 5 - 6: k to end.
Round 7: sl st, *k 6, ssk, k2tog, repeat to last 10 sts, k 6, ssk, k the last st and the first slipped st of the same round together, then put the ring st marker at the end of the round. (56 sts)
Round 8: sssk, k3tog, k 2, repeat to end.
Change to double pointed needles.
Round 9: switch next 2 sts putting the second st in front and keeping them on left needle, (k 1, yo, k 1) into each of these 2 sts, k 2, repeat to end. (56 sts)
Rounds 10 and 11: k to end.
Round 12: k 1, ssk, k2tog, k 3, repeat to end. (42 sts)
Round 13: ssk, k2tog, k 2, repeat to end. (28 sts)
Round 14: sl st, *k2tog, ssk, repeat to last 3 sts, k2tog, k the last st and the first slipped st of the same round together through back loops. (14 sts)
Cut yarn, leaving a 6" (15 cm) long yarn tail, pull it through all sts and tighten together. Weave in loose ends.

Lastly, feel free to leave a comment if you have any questions or find something confusing in the pattern.
Happy crocheting/knitting! follow me on Instagram @wiams_crafts and Twitter @wiamscrafts to see my upcoming projects.


0 comments:
Post a Comment