
Hello everyone! Frankly, I think I am obsessed with animal themed granny squares. Every time I browse the Internet and catch a picture of an animal, the first thing that comes to my mind is: can I make a granny square with its cute face on it? A koala’s face is easily recognized by its big oval nose, large ears, and small eyes. The challenge for me this time was to keep the big ears within my granny square base, which I succeeded at after numerous trials. I hope you all like it and get to make it for your next project.
Skill level: Intermediate
Get printable PDF for this pattern: or
Check out the entire Animal Granny Square collection:
Puppy | Frog | Chick | Kitty | Chicken | Mouse | Bunny | Ox | Tiger | Duckling
Materials:
- Yarn: any cotton yarn in the following colors and quantities: one gray skein, one light green skein, a few yards/meters of off white, black, brown and green. Suggested yarn: DMC Happy Cotton, 0.7 oz (20 g), 47 yards (43 m).
- Crochet hook, size E/4 (3.5 mm).
- Tapestry needle.
Crochet terms (US):
- ch: chain.
- st: stitch.
- sts: stitches.
- sl st: slip stitch.
- sc: single crochet.
- hdc: half double crochet.
- dc: double crochet.
- tr: treble crochet.
With the gray yarn, make a magic circle, work as follows:
Round 1: ch 1 into the magic circle, sc 7, sl st into the first ch. (8 sts).
Round 2: ch 1 and sc in the first st, sc 2 in each st, sl st into the first ch. (16 sts).
Round 4: repeat row 3. (36 sts).
Round 5: ch 3 and dc in the first st, dc in st twice, *dc 2 in st, dc in st twice, repeat from * to end, sl st into the third ch of the first ch 3. (48 sts).
Round 6: ch 3 and dc in the first st, dc in st three times, *dc 2 in st, dc in st three times, repeat from * to end, sl st into the third ch of the first ch 3. (60 sts).
Cut off light green yarn and weave in loose ends.

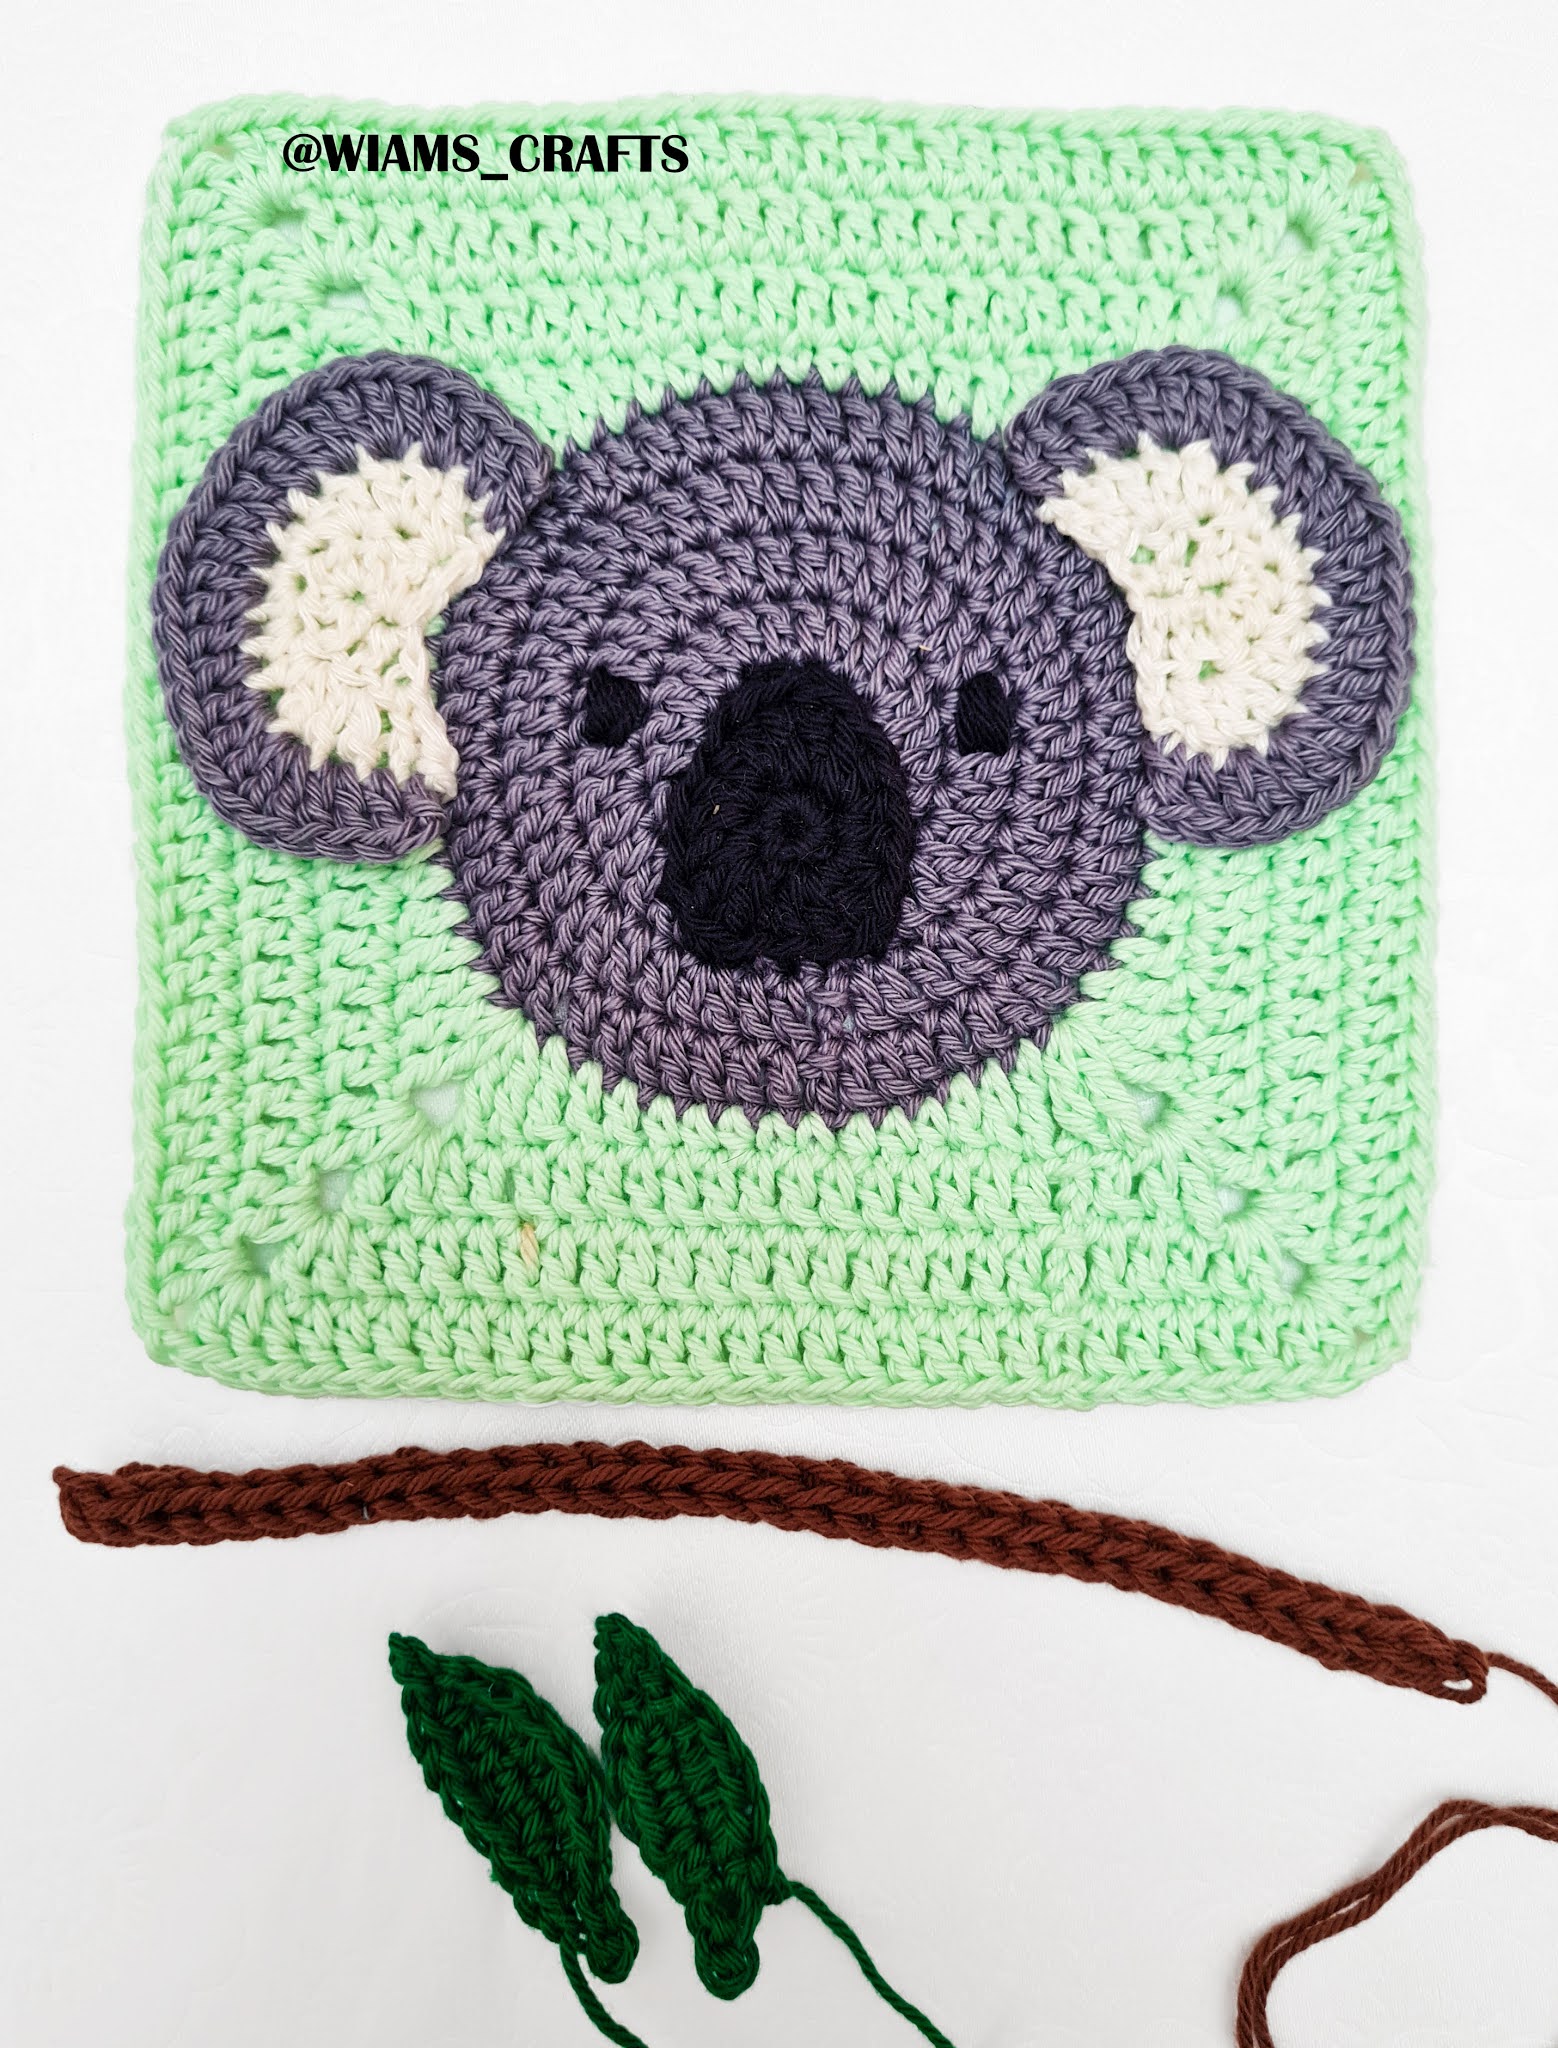
Leaf (make 2):
With green yarn ch 10, sl st into the second and third ch, sc in ch twice, hdc in ch three times, sc in ch twice, make a picot (ch 3, sl st into first ch), now turn into the other side of chains, sc in ch twice, hdc in ch three times, sc in ch twice, sl st into next ch, cut yarn leaving 4" (10 cm) for sewing in place.

Sew ears, nose, twig and leaves in place as shown in picture. With black yarn, embroider the eyes.

Lastly, feel free to leave a comment if you have any questions or find something confusing in the pattern.
Happy crocheting/knitting! follow me on Instagram @wiams_crafts and Twitter @wiamscrafts to see my upcoming projects.


hi I'm finding the instructions confusing... worked out the base close enough but how do you do the ears and I'm presuming the nose is just as confusing??
ReplyDeleteHello there,
DeleteI've made some changes to the written instructions and the chart to make them clearer. Hopefully they are easier to follow now.
Just confused because there’s no instructions for the twig? Like what the heck is an I cord?
ReplyDeleteHi, I know I should've made a video to show how to work the I cord, but you can look it up on youtube. It is easy.
Delete