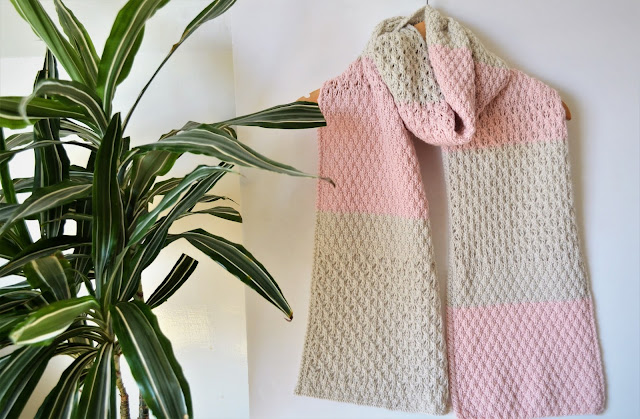
Hi there! Here is my new shawl with v-shaped rose stripes. It
took me a very long time to finish. Although the pattern is very easy, it
requires a lot of counting and concentrating. I’ve made another one earlier this year, using one color.
Unfortunately, it was purchased before I had a chance to take photos of it.
Skill level: Intermediate
Note: this pattern follows
the filet crochet technique. You can learn more about it by watching this video:
Materials:
- Yarn: Alize superlana tig, 75% acrylic, 25% wool, 3.35 oz. (100 g), 623 yards (570 m), in the following colors and quantities: Coffee with Milk 584 (2 skeins) and Cream Mélange 213 (2 skeins).
- Crochet hook, size US D (2.5 mm)
Measurements: 77" x 39" (196 x 98 cm), excluding the fringe.
Crochet terms (US):
- ch: chain.
- sc: single stitch.
- dc: double crochet.
- tc: treble crochet.
- sl st: slip stitch.
- ch5picot: ch 5, sl st to first ch.
Important note:
I have
designed the rose relief shawl pattern out of a pixel art drawing I found and
liked on pinterest, and so this pattern
may be confusing. So let's clear the confusion first; Just imagine it is a cross-stitch embroidery pattern:
- The
pattern boxes are of two colors; white and black.
- Each
horizontal row of boxes is a crochet row.
- Each
row starts with ch 4, and ends with tr stitch to increase the number of the sts tin order to expand the triangle shape.
- You
crochet each row by doing numbers of either dc or ch.
- The
black box means work 3 dc
- The
white box means work dc, ch 1, dc
- The
boxes share the vertical sides, which means the first or last dc 1 is previously
mentioned.
- At the bottom of this post, below each image of the patterns I made, there is a link to the same image in HD. It is better to print or save them to your viewing devise so you can follow the design easily.
Instructions:
Note: you are going to start the work
from the bottom and up.
Row 1: With dark color, start with
ch 6, sl st to first ch, turn.
Row 2: ch 4, dc in first st of row 1, skip
1 ch, ch 1, dc in next ch, ch 1, tr in the same ch, turn.
Row 3: ch 4, dc in tr, skip ch 1
space, ch 1, dc in dc, dc in ch 1 space, dc in dc, skip ch 1
space, ch 1, dc in third ch of ch 4 of previous row, ch 1, tr in the same
ch, turn.
Row 4: ch 4, dc in tr, skip ch 1 space, ch 1, dc in
dc, dc in ch 1 space, dc in dc 3 times, dc in ch 1 space, dc in
dc, skip ch 1 space, ch 1, dc in third ch
of ch 4 of previous row, ch 1, tr in the same ch, turn.
Row 5: ch 4, dc in
tr, skip ch 1 space, ch 1, dc in dc, dc in ch
1 space, dc in dc 7 times, dc in ch 1 space, dc in dc, skip ch 1 space, ch 1, dc in third ch
of ch 4 of previous row, ch 1, tr in the same ch, turn.
Row 6: ch 4, dc in tr, skip ch 1 space, ch 1, dc in
dc, dc in ch 1 space, dc in dc, skip dc, ch 1, dc in dc 7
times, skip dc, ch 1, dc in dc, dc in ch 1 space, dc in
dc, skip ch 1 space, ch
1, dc in third ch of ch 4 of previous row, ch 1, tr in the
same ch, turn.
Row 7: ch 4, dc in tr, skip ch 1 space, ch
1, dc in dc, dc in ch 1 space, dc in dc, skip dc, ch 1, dc in
dc, skip ch 1 space, ch 1, dc in dc, skip dc, ch 1, dc in dc 3 times,
skip dc, ch 1, dc in dc, skip ch 1 space, ch 1, dc in dc, skip dc, ch
1, dc in dc, dc in ch 1 space, dc in dc, ch 1, dc
in third ch of ch 4 of previous row, ch 1, tr in the
same ch, turn.
When you look at the detailed drawing, you will notice the
way the crochet pattern matches the rose relief design. Every white box is
(skip st, ch 1) crocheted, and every colored box is filled with (dc
in dc).
The detailed drawing clears the beginning of the shawl,
once you start and get the idea, the work will go easily.
Follow the pattern as shown in the detailed drawing.
For Full Size Click Here
Click Here for
HD picture
Click here for
HD picture
Color change:
The pattern shows when to change to other color.
Edging:
Click here for
HD picture
Bind on dark color to the edge of last row, ch 1, sc 3
in ch 3 space, *make ch5picot, sc 3 in next ch 3 space, repeat along the side
of triangle, change yarn according to color design of shawl.
When you reach the lower angle of the shawl, work as
follow: (sc 3, ch5 picot, sc 3) in the first row ch space.
Weave in loose ends and block. Make the fringes along
the two sides as shown in the photo.
Lastly, feel free to leave a comment if you have any questions or find something confusing in the pattern.
Happy crocheting/knitting! follow me on Instagram @wiams_crafts and Twitter @wiamscrafts to see my upcoming projects.


